Saturday, 8 November 2014

Candy Cane Body Scrub!


Christmas is just around the corner and if your low on money or just don't know what to get your family member of friend then I got you covered. This is a super cheap, easy and definitely adorable DIY that has a ton more love than anything you can buy from the store!

For this DIY you are going to need:

Olive oil (you can use another plant 
based oil if you would like)
Sugar ( If you want to use this in more sensitive areas like your face then I would recommend using caster sugar)
Peppermint essence 
Red food colouring 


You will also need: 
A jar with a lid
Bowls for mixing in
Spoons


In one bowl mix 3/4 cup of sugar with about one and a half tablespoons of olive oil.You can add more or less depending on how you like it. I think it's good to have it not soo sticky that it is in a big ball but if you grad a bit with your fingers and squish it the sugar will stay together.  Once you have mixed it well it should look like this. 


Add 1 teaspoon of peppermint essence and stir well. 

You should now have one bowl of white peppermint sugar scrub. 

I then made the same recipe in another bowl but when you get the this point in the recipe add one drop ( and no more) of red food colouring. Mix this in well. You should now have on bowl of white and one bowl of red sugar scrub. 

Putting it all together:

Grab your jar and a heaped teaspoon of on of your different coloured mixtures and place iron the bottom of the jar. Flatten it down so the next colour doesn't go in all wonky. 


Then do the same thing with the other colour. Alternate colours until you get to the top of the jar. 


And your almost finished! Just one
Last step. 

My kid is a bit of a dull green colour so I took a circle of pink paper the size of my lid and glued that on the top. I wrote "Jean's Candy Cane scrub" on it but you can write anything you would like. And for the finishing touch I tied a ribbon around the outside of the jar. 


And that's it! A super cute easy DIY that you can use to treat yourself or give to someone else as a very lovely home made gift! 
If any of you guys try this out make sure to send me a pic over on my Instagram, @jeans_space. I would love to see what you guys come up with!

That's all for now. Hope you enjoyed today's post!
Jean xx


Sunday, 26 October 2014

Interview with The Luckie Bunny Blog!

Hey guys,
Today I am doing an interview with a new blogger from The Luckie Bunny Blog, you can find her blog HERE. We also did an interview on her blog as well so hop on over here to see that.
Alright lets get started!

1)Tell us a little bit about yourself?I love to be known as ‘syasya' or ‘ mysyaa' .. im 15 yo .. I live in malaysia . I'm second from 4 siblings .. I just have a brother and he is the eldest .

2) What genre would you say your blog is, or is going to be?
I love to tell about my life my story life .. I want to let readers know .. what I'm doing . what I like. yah.. mostly about my life ..

3) Fave picture from your instagram?

For now .. the ring pic .. 

4) Who inspired you to start a blog?Lucky Dolphin ( Athisha Khan ) 

5) Fave instagrams and blogs?
@oh.kitty @freshlypickked @athishakhan and you 

6) If you could travel anywhere in the world where would you go?
I want to go to mecca to perform my Hajj and Korea.

7) Fave colour?
Pastel colours mostly white and red solid.

8) Where do you find inspiration?
from Lucky Dolphin blog.

9) Fave youtubers?
Lucky dolphin.

10) Fave food?
Tofu japanese food and my mom's cooks.

11) Describe the theme of your instagram?
Idk how to describe since I'm still thinking about the theme .. haha.

12) What do you think the future will hold for you?
As a well-known blogger or as a TV host.

Alright thats it for today. Make sure to check out the interview on her blog.

Jean Xx


Tuesday, 21 October 2014

Galaxy Nails!

Galaxy Nails
Hey guys,
This is going to be my first tutorial about how to do what I like to call galaxy nails. Although they may look difficult they really aren't.
So here we go....


Step 1. Gather your materials


Im going to be using 5 colours but you can really use more or less and feel free to change up the colours if you like.
I'm using:
Miki blue
Revlon Chalkboard- Straight as
Revlon Expressionist- 360 Vincent VanGold
Any top coat you happen to have
Any base coat.
Small make up sponge
Tweezers
A piece of paper

Step 2.
Create your background
Im going to be using my black but you can use any dark colour.


Step 3. Making the galaxy.
Once the base colour is dry Get your first colour and dab a bit onto the paper. You may have to add more. Using the sponge dab a small amount across each fingernail. Make sure that you can still see the base colour underneath. It is also best to use a clean sponge.

Another step you could do is to paint a coat of a top coat containing sparkles. I decided not to because I didn't want it to get too messy.


Step 4. Creating volume.
Get your next colour, I'm using gold, and do the same thing, dabing the colour on using the sponge.
I then also did the same thing with the purple.

Step 5. Stars
Using a thin tipped white brush (or just being very careful)draw little dots onto each nail. You could even add a few actual stars by drawing tiny crosses.

And you're done! go ahead and admire your little masterpieces. See it was a lot easier than you thought, wasn't it.

Tats all for now guys I hope this was helpful. If you do try this out please leave a picture below to show me how it went!
Jean Xx

Saturday, 27 September 2014

Paris

Hey guys, 
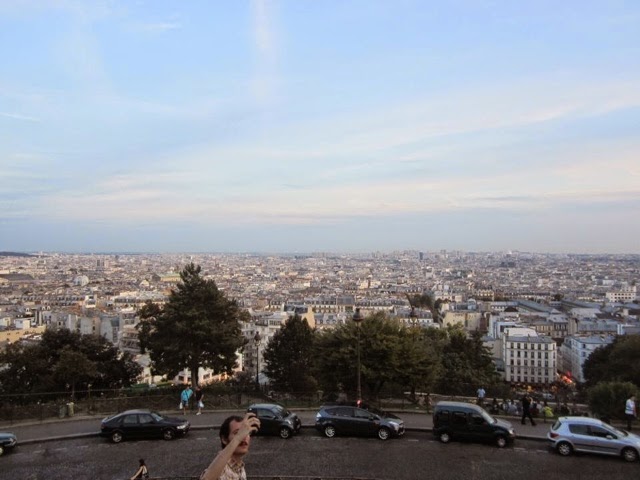
I have another travel update for you today, Paris! I stayed  in Paris for a week. It was really nice and the weather was perfect. We stayed in this tiny flat, I didn't even have a real bed but it was super close to a bakery so we had really nice bread every morning. 
Anyway, I have a few pictures to share with you from the trip!

The first view we had of Paris. 

                 Notre dame. 
Basically just a giant, very old door. 

The next two photos are from the catacombs but I won't show you to many of them because its kinda gross, and if you don't know what the catacombs are, it's basically a buch of skeletons in the sewers if Paris...


And that's it for today guys! See you later!

Sunday, 14 September 2014

Singapore

Hey guy's 
So since I'm going to be doing a lot of traveling over the next few weeks I have decided to start up a little series. It just going to be about what I'm getting up to and what I like to take with me and things like that. 

I have just been to Singapore, it was very fun, but extremely hot! We spent the day walking around the gardens and nosing around the Marina Bay Sands mall. There are these to big dome buildings at the gardens ons inside one of them is a big mountain with waterfalls flowing over the sides. I would definitely recommend it. I shall include some pictures of the adventures we got up to below. 

The mountain inside the dome. 
 
The mountain again. 

Marina Bay Sands Hotel

I'm sorry, but how good does this look?!?!?

Sorry for the short post but I will be trying to keep you updated with each place I go, off to London next!

Tuesday, 2 September 2014

August Favourites


Hey guys,

Wow its friday! sorry tht this post is so late, im trying ti get better at posting on time. But as you can tell by the title this is my August favourites. There have been a lot of things that I have been loving during August, but I couldn't write about all of them so here are just some of the best.

Orange Body shop spray.

This is actually one of the best things ever and I think I'm slightly obsessed. I think it just smells so amazing and there are so many other different scents, but I think that this one is my definately my favourite, I would definately recommend this!


Batiste Dry Shampoo

This stuff is amazing. I use it so much and it's definitely going to be something I
re-purchase. It works so well. If my hair is slightly oily and I can't be bothered washing it I will just spray a bit of this into my hair right before I style it and i now have instantly gorgeous hair. The scent isn't the nicest but it fades away. I have it in the scent floral and flirty.

July Issue of Frankie Magazine

I have been loving this issue. It has such a cute cover! I just love the colour (even if its quite plain) But obviously I read it first. I always love reading Frankie but I think what blew me away on this issue was the cover.

Blistex Lip Balm

I know this is kind of boring but this is definitely something that I could not live without. I really like stick lip balms because they just seem a lot more sanitary to apply, you don't have to stick your dirty fingers in the lip balm. And obviously something that's very important to make a good lip balm is how well it repairs your lips. I wouldn't say that this is one of those lip balms that repairs your lips straight away, it's one that you can just put on whenever you like for a bit of extra protection and it also gives your lips a nice shine. But this is definately a must have!

Thats it for me today, sorry the post is late, I have had quite a lot on my plate at the moment.

Jean Xx


Friday, 22 August 2014

Stripy Nail Art Tutorial!

Hey guys,
So I have another nail tutorial for you today. It's a stripy, clear nail polish look today.


How I achieved this look was by first making sure I didn't have any nail polish on my nails, this is the most important step. I then took very thin pieces of masking tape and placed them onto my bare nails. You can put these as far apart or as close to each other as you like. I then painted a block colour on. I used Revlon Expressionists in chalkboard, but you can use any colour you would like. Then moving on quickly to the next step start peeling off the tape. Once you have peeled off the tape and let your nails dry you can then apply a thick layer of topcoat to even out any bumps.
And you are done!

Thanks for reading and coming here to my blog and if you  have a minute then make sure to subscribe.


Jean Xx


Sunday, 10 August 2014

Dreams

Hey guys,
So today's post is going to be very short and sweet and its just about a little one of my dreams. 

When I am older and more qualified, one of my dreams is to run my own shop. A small shop where everything is hand made and VERY adorable. These kinds of shops have always been my favourite kind of shops (although they are quite pricy). One of my favourite magazines is Frankie. It's a very cool Australian magazine with a hand made kind of feel. And it has a lot of home made little boutiques in it which I love to check out!


And that's it for today, sorry for the rushed/slightly cheesy post

*What's your dream?*

Jean Xx

Friday, 1 August 2014

Back to school: Organization.

Hey guys,
So sorry my post is quite late this week, my computer deleted all my work so I have to rewrite the whole post :(:(:(
Anyway, I am doing a back to school post today. I really hope you find this helpful, and post some pics down below if you try out any of these DIY's.
Also I apologize for the lack of photos and the photo quality, I started doing it and then decided to do it as a blog post afterwards.

The first DIY is on how to "glam" up your book.
You will need:
Washi tape
Paper big enough to cover your book
More scraps of paper
Pen
Scissors
Glue

Cut a piece of paper to fit onto the back and front of your book. You want to leave about 5 centimetres on each end (So you can wrap it around onto the inside of your book).
Then go ahead and glue it down. If you want you can do the same thing but with different pieces of paper for the front and the back.
Grab your washi tape and apply it to all sides of your book and along the back binding. 
Then you can cut out a small rectangle of paper to be the name tag, glue it down and write on it.

My next DIY is all about pencils.

You will need:
Washi tape
Scissors
Pencils
Clear tape

First go ahead and lay out you pencils and run out a lengthy of washi tape long enough to fit along you while pencil and cut.

Careful roll it around the out side of your pencil. You can take as long as you want with this bit as it looks better If its smoother.

And if your washi tape is anything like mine you will have noticed that it isn't quite wide enough the fit all the way around the pencil so you will have to do this again on the other side, and don't worry it doesn't have to match up.

Then to finish it off just run some clear sell tape over the joins to hold it and you done!

A very stylish book and some extremely cute pencils.

And that is all for today hope you enjoyed and if you do try out any of these ideas then leave a comment down below with your pictures! 
                              Jean Xx         


Tuesday, 29 July 2014

Best and Worst

Hey guys,
For my post today I am going to be doing something a little bit different. Its called Best and Worst. I saw someone do this kind of thing on their blog and I wanted to give it a go. I basically just say what the Best and worst things were for me over that week. It will just give you a little bit more insight into what I like and things that I get up to. Comment down below what you think and if you want me to start doing this as a regular thing.
Brownie in a Mug <3
Best:
1. THIS!

2. I know I'm a bit late to the party but I have just found the Maybelline Colossal Volume mascara, and its amazing. I'm just going to leave it at that.

3. I know this is super weird but I was listening to the radio and an ad came on. And not just any add, an add for christmas. I'm excited already and it's only July.

4. Also this blog! Heres the Link. (The blog I got this idea from)

Worst:

1. The weather at the moment. As you might already know where I live it is winter and the other day it was five degrees. While you guys are all over there in Europe experiencing the hottest July ever recorded, we are down here in five degree weather.

2. It got to five degrees and the weather station said it was going to snow and it didn't. Worst day EVER.

3. I forced myself to go for a run. Not a good idea.

And that is it for today guys, sorry for the short/rushed post, I will be posting some back to school tutorials very soon so stay tuned for that!

Jean Xx


Friday, 25 July 2014

How to keep your nails healthy and beautiful!

Hey guy's
I have another nail post for you today, but this time its my nail care routine. Hope you all enjoy and learn something from this.

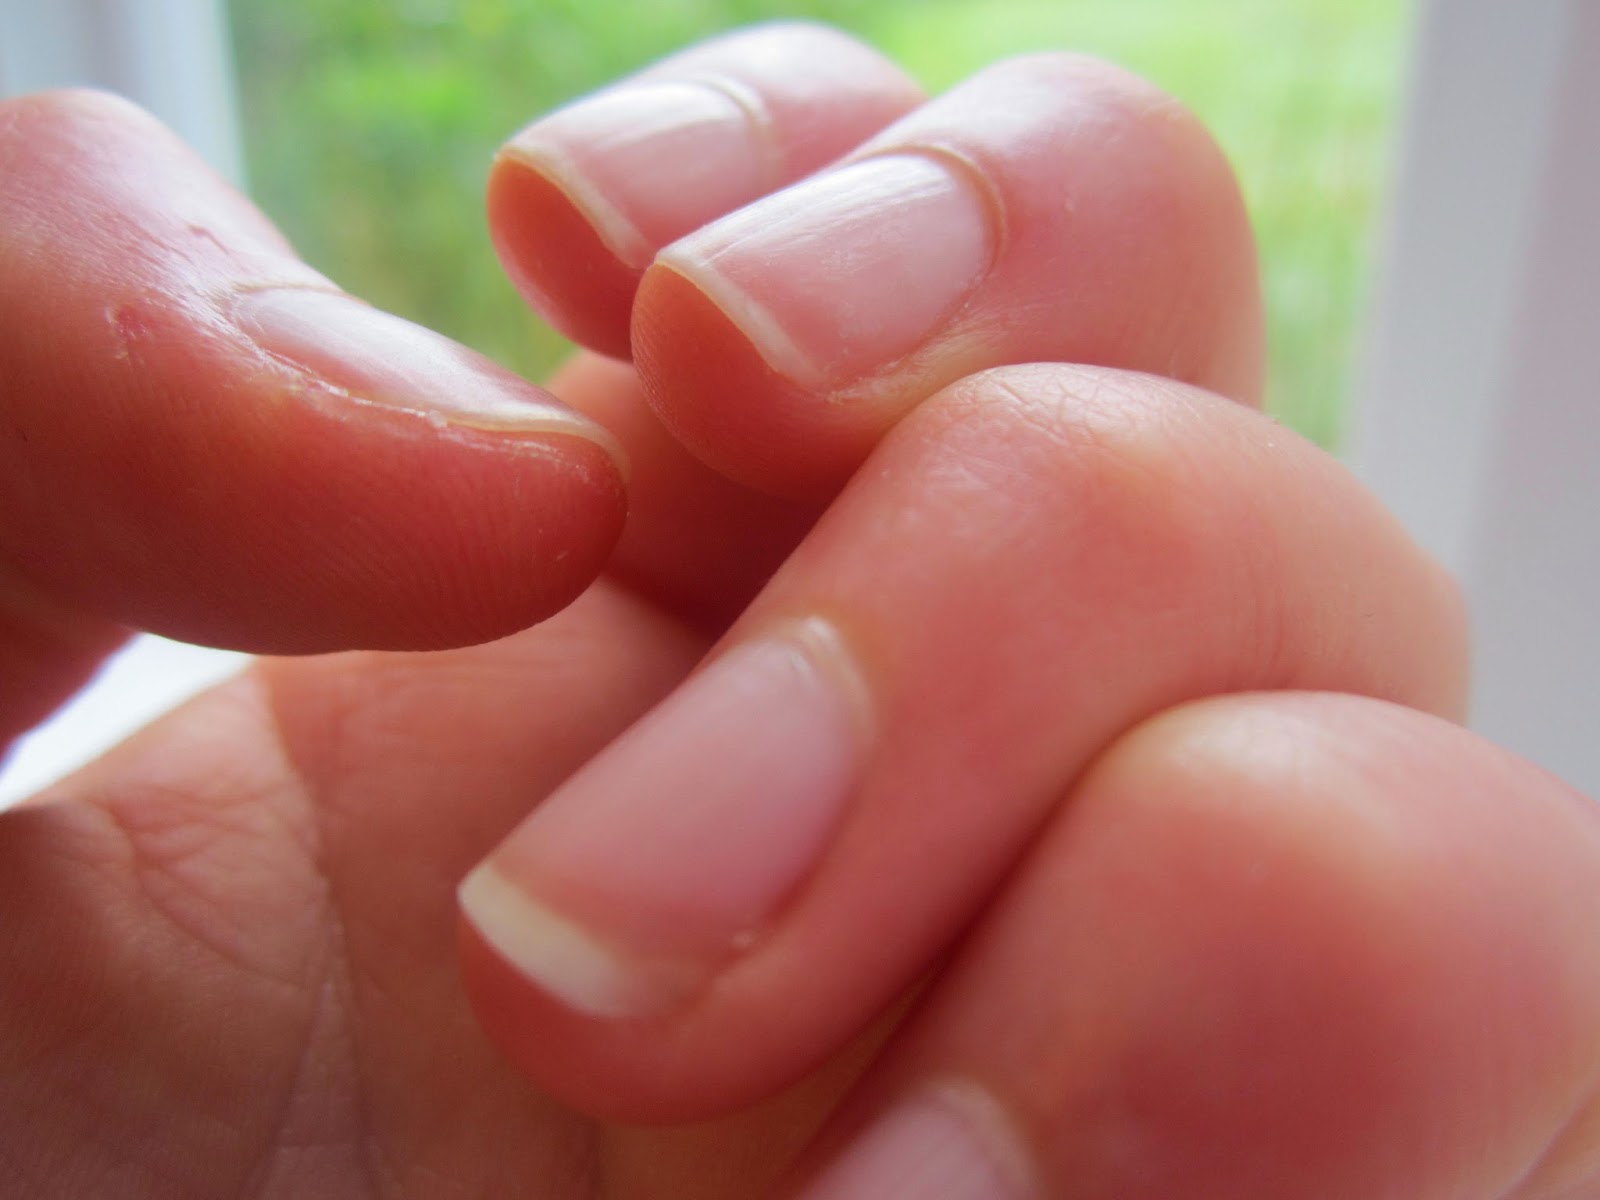
We all want those perfect looking professionally done nails right? But obviously for most of us that is something thats just a wee bit expensive to indulge in all the time. But taking proper care of your nails at home can be a fine substitute for those beautiful nails we all desire.

And the first step is moisturizing. Moisturizing is very important in keeping your nails healthy. I will usually use the Aveeno Daily Moisturising Lotion. Its really light on my skin and definitely works as a good moisturiser. I will usually apply this twice a day in the morning and at night.

I am usually quite generous with moisturizer and will squirt a big blob out onto one of my fingers and then dab it onto each of my other fingers. After that, using my thumb I will rub the moisturiser gently into each finger. During the day if I wash my hands I will apply moisturizer again as water actually drys out your hands.

It is best to cut your fingernails at least once a week. I usually cut mine straight across the top and then file them slightly curved around the edges.

Using the nail clippers, or nail scissors, cut any hangnails or skin tags you may have around your nails.


Then grab your nail file and using the finer side soften the edges around your nail into a slight curve. Never file back and forwards as it can cause splitting and can damage your nails. Only file one way, make sure to do it gently too.


At this point sometimes I like to re apply my moisturiser.


And thats how to keep your nails nice and healthy. I do have one more tip on how to get rid of hangnails but I think I will have to save that for my next nail tutorial so stay tuned for that.
Thats all for today,
Jean Xx